One of the reasons I created this blog is to share my experiences with other enthusiastic geeks who love this kind of niche content like me.
In this series of articles, I will explain to you how I reverse-engineered the communication protocol used between an attendance reader and its (Windows-only) client, and we will create an alternative client with Rust and Tauri to replace the proprietary one.

A bit of background #
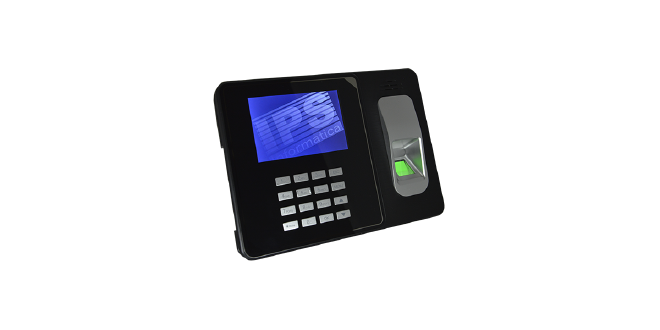
My dad wanted to update the old attendance reader for his small business, so he went straight on Amazon and bought the R701 from I.P.S. Informatica.
Unlike the old reader, with this one employees can record their presence via PIN, fingerprint, or RFID badge, then the records can be downloaded through the official Windows client or via a USB stick.

The problem is that the client, besides being installable only on Windows and requiring an account to perform even offline actions, doesn’t meet my dad’s requirements.
It would be appreciated if a report was generated every month for each
employee, with a table showing the hours worked each day. Instead, the official
software only allows you to download a list of presences, without any kind of
division by month or employee, and it doesn’t allow exporting everything to a
.ods file.
So, in pure “Stallman when the new Xerox printer jams” mode, I decided that the best solution was to rewrite everything in an open-source way.
Dumping the records via USB #
To begin, I tried to download the records using a USB stick, as this method doesn’t require a Windows PC. I formatted a USB stick in FAT32, and after creating a test user and making a few records, I downloaded the data to my laptop.
Once I opened the contents of the USB stick, I noticed that the reader had created two files:
~tmp.tmp: which contains the stringusb test!!repeated 384 times;AGLog_001.txt: which contains the records.
I believe that the ~tmp.tmp file is used by the reader only to check if the
USB stick is writable, so we can ignore it.
Opening the AGLog_001.txt file, we can start to look at the various fields
that the reader stores in memory:
No	Mchn	EnNo		Name		Mode	IOMd	DateTime
000001	1	000000001	test      	34	0	2024/04/28  16:04:23
000002	1	000000001	test      	33	1	2024/04/28  16:05:28
000003	1	000000001	test      	35	2	2024/04/28  16:08:49
000004	1	000000001	test     	35	3	2024/04/28  16:09:01
Nois the record IDMchnis the reader IDEnNois the employee ID who made the record (Enployee Nomber?)Nameis the employee’s nameModeis the method by which the employee recorded their presence:33is via fingerprint34is using a PIN35is with the badge
IOMdis the field containing the employee entrance or exit (In/Out Mode ?)0is the first entrance1is the first exit2is the second entrancance3is the second exit
Datetimeis the date and time of the record
Considering that I recorded the test records by passing through all the entrance and exit modes in order, using the PIN the first time, the fingerprint the second time, and the badge the last two times, we can be satisfied with the result.
We could even write a Python program using the csv library to extract the data we need from this file.
But this wouldn’t be interesting enough to be a blog post. I don’t want to
enter the device’s admin menu, press the 2, 1, and 2 keys in order to
make a dump, then take the resulting file and filter it with a Python script
without a graphical interface.
I want to create a program that runs natively on Windows and Linux and allows me to download all the data I care about with a single click, in the format I need.
Before pulling out Wireshark and trying to sniff some packets, I want to try another technique…
Decompiling the closed-source client #
As a wise man once said, “All source code is open source if you can read Assembly”.
Since the company that wrote the code is Italian and the client only works on Windows, there’s a high chance the code is written in C# on the .NET platform.
If this is the case, it should be pretty straightforward to get the source code through a decompiler like CodemerxDecompile.
So I created a virtual machine with Windows 10 AME and installed the official client at version 04.03.02.

Once I installed the official client, I copied the C:\Program Files (x86)\ipsAttendant directory onto my Linux machine and opened it with
CodemerxDecompile.
As I expected, the code is written in C#, so it’s easily readable.

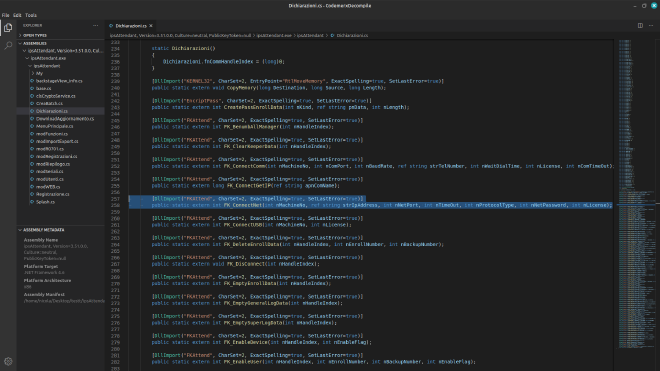
Searching here and there, I found out the bitter truth: inside the
Dichiarazioni.cs file, there are many interesting methods, such as
FK_ConnectNet(). However, these methods are all imports from a library called
FKAttend.dll.
Searching the web, it seems this library has been around for many years, and I highly doubt the company that made the reader wrote it themselves. I also found the official DLL documentation, but nothing else.
Since decompiling a library that even the creator didn’t bother to implement themselves is not something I’m willing to do, in the next article, we will try to reverse-engineer the communication between the client and the device.


